Setting up a PHP development environment using Visual Studio Code and XAMPP on Windows
Download and install Visual Studio Code
You can find the Visual Studio Code installer on the following permalink: https://code.visualstudio.com/
Set up PHP Debug VSCode extension
- Open the Visual Studio Code command Palette with
CTRL+SHIFT+P - Find the PHP Debug extension by typing "PHP Debug"
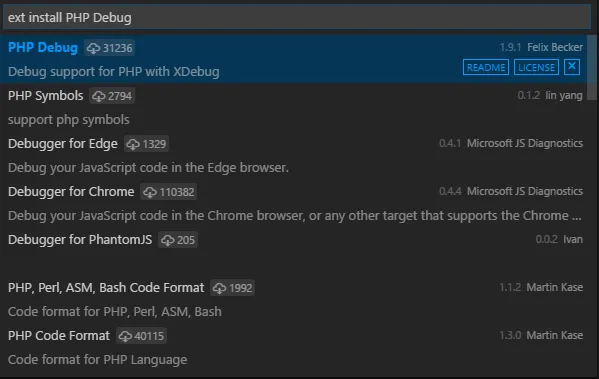
- Install the first match from Felix Becker
Install XAMPP Package
Note: If you already have a PHP Development environment, you can skip this step.
-
Download and install XAMPP from https://www.apachefriends.org/index.html
-
(Optional) If you already have IIS, Skype, or any Java app that uses port 80, you might want to change the Apache port. However, it's recommended to change your app's port instead (you can search online for instructions, e.g., how to change Skype's port). To change the default Apache port, follow these steps: a. Go to the
httpd.conffile for Apache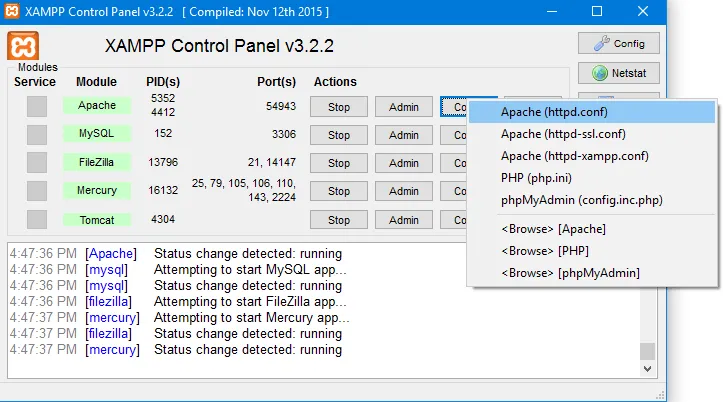 b. Find the
 Listenline and change the port to your desired port. For example:Listen 8066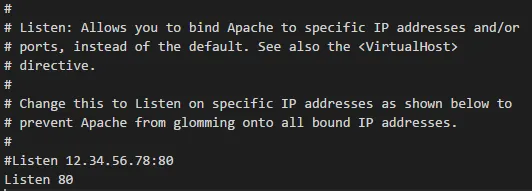
c. Save and restart the server
-
Go to the
<ROOT>\xampp\htdocsfolder and replace its contents with your PHP solution
Open the development folder with Visual Studio Code
In Visual Studio Code, go to File -> Open Folder and open <ROOT>\xampp\htdocs (where you put your PHP files).
Install and configure XDebug
There are two ways of installing the right XDebug version for your development machine:
-
If you're familiar with PHP development, you likely know the
phpinfo();global function. -
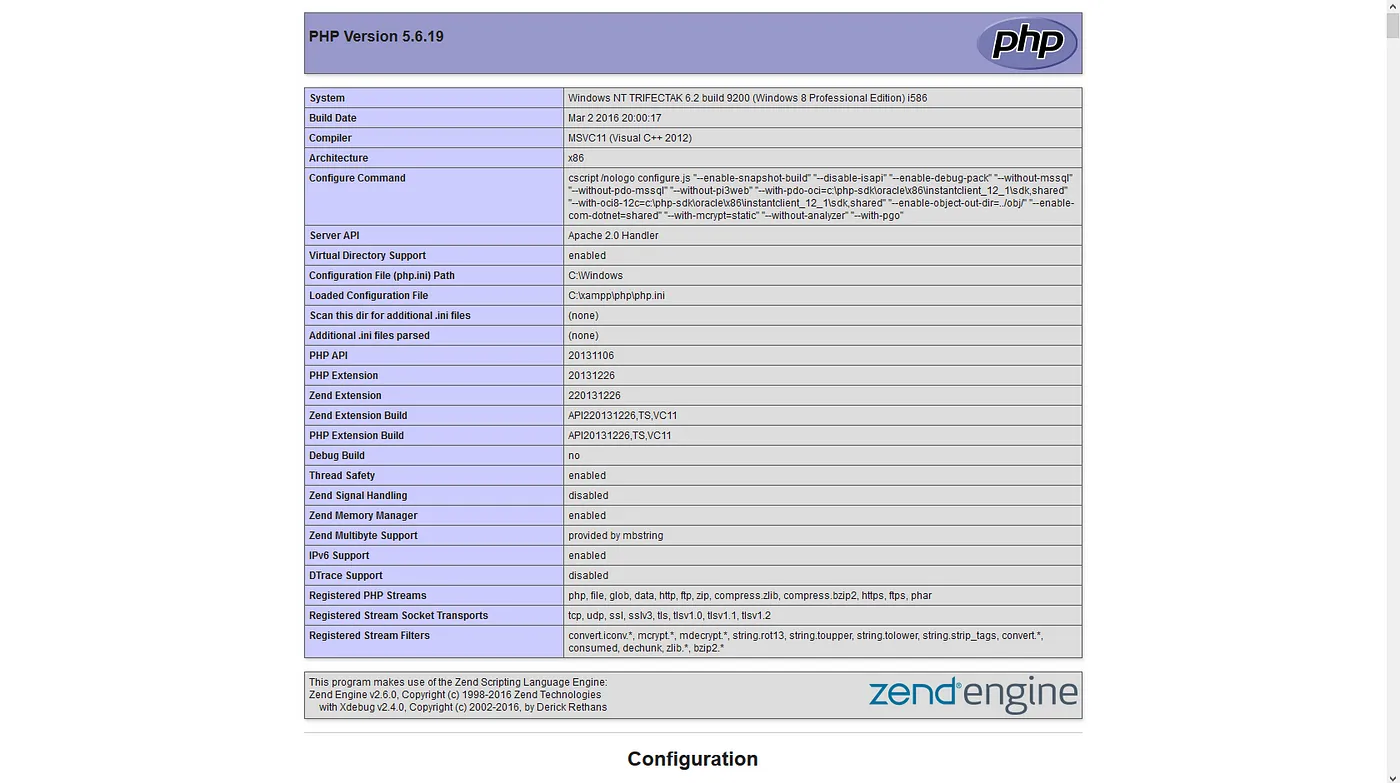
If not, create the following file in your
htdocsfolder:<?php phpinfo(); ?>Place it in your development folder, then open it with your browser. It should look something like this:
-
Copy and paste the page content into the XDebug wizard's text field at https://xdebug.org/wizard
-
This will provide you with:
- A download link for the correct XDebug binary
- Instructions on how to install it
- A line of code to add to your
php.inifile (save this for the next step)
Modify php.ini
-
Open your
php.inifile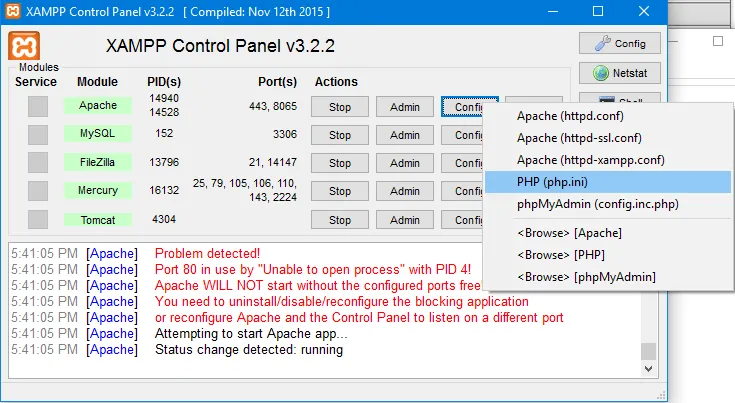
-
Paste the following lines at the end of the file:
[XDebug] xdebug.remote_enable = 1 xdebug.remote_autostart = 1 -
Add the generated XDebug line below these new lines
-
The final result should look like this:
[XDebug] xdebug.remote_enable = 1 xdebug.remote_autostart = 1 zend_extension = "C:\xampp\php\ext\php_xdebug-3.1.4-8.0-vs16-x86_64.dll" -
Save the file and restart the Apache server
You should now have a fully configured PHP development environment with Visual Studio Code and XAMPP on Windows!